The Four Physical Failure Mechanisms of Component Failure
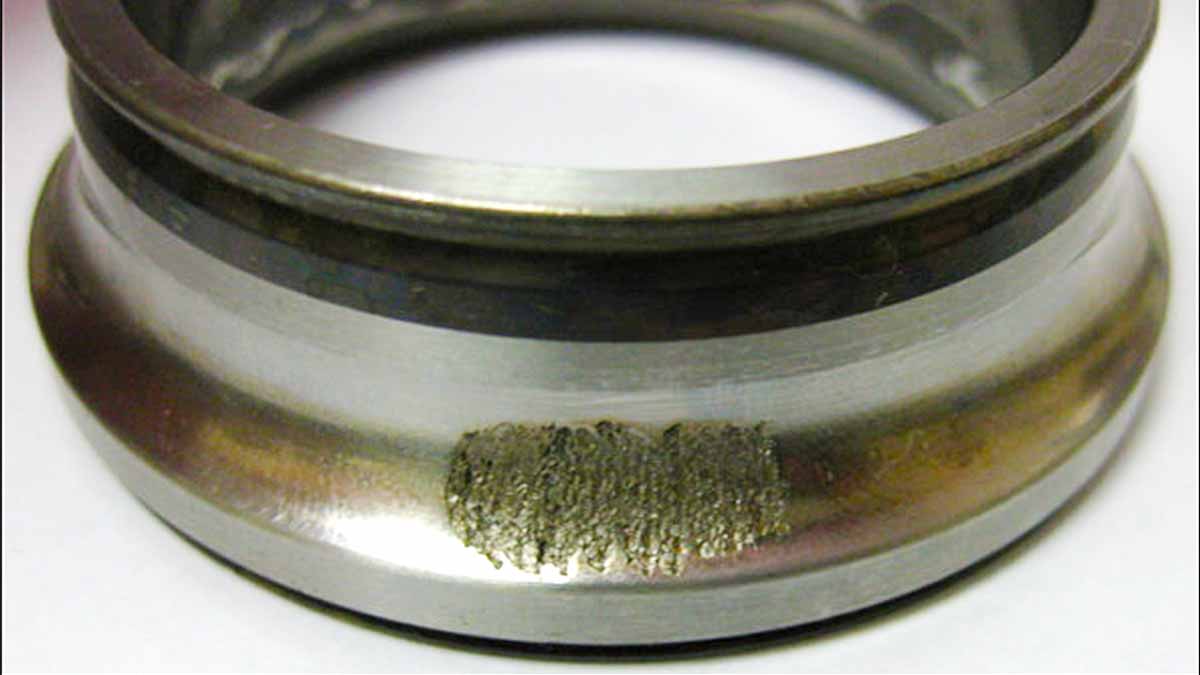
This article targets the 'first responders' who arrive immediately at the failure scene. These people must ensure the area is safe, preserve the scene for investigators, and contribute to a plan to expedite a quick, safe return to production norms.
Many must understand how valuable failed parts are to metallurgical/forensic investigators. Broken parts are to metallurgists like a murder weapon is to a forensic crime investigator.
This article aims to educate those who have first access to the failed parts and why they should preserve them in their failed state (not clean them up). We want to give them enough knowledge to be dangerous and raise their curiosity about making a call about the fracture patterns they see.
Most components fail for one or a combination of four (4) primary physical reasons.
Erosion
Corrosion
Fatigue
Overload
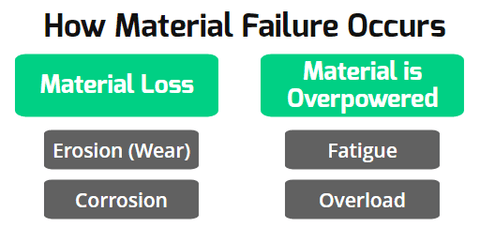
When investigating failures involving components, their fractured surfaces tell a story about what happened to them. As you approach any such failure scene, try to visualize being that failed part and think, "What just happened to me?"
Visualize the part being in operation and the forces affecting it. It seems corny, but it is a very effective approach to understanding what happened. Let's explore the basics of these very involved failure patterns.
Erosion
Erosion is caused by particles in the process medium contacting and damaging a surface. Erosion can be delivered from fluid/air:
Fluid/air contaminated (particles present)
Fluid/air viscosity changed
Fluid/air velocity changed
Material eroding is wrong material for existing service
Materials are not compatible
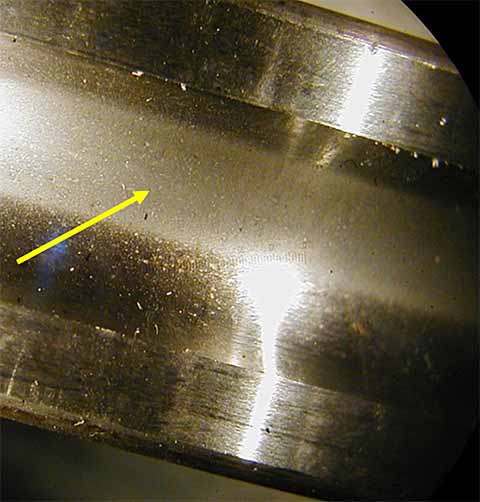
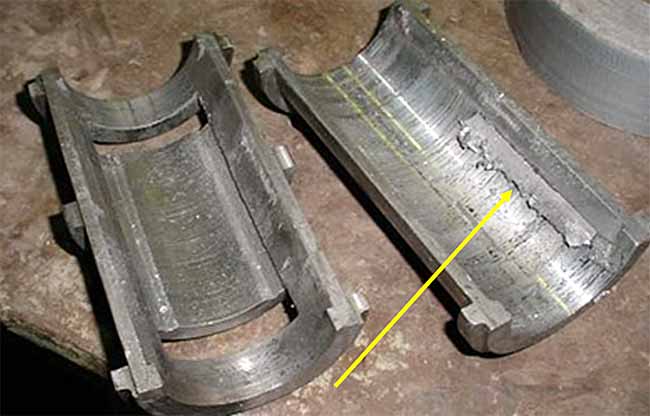
Erosion can be abrasive or adhesive. Here are some basic examples:
Abrasive Erosion - Bearing
Adhesive Wear - Bearing
Corrosion
Corrosion is the deterioration of a material due to interaction with its environment. It is the process in which metallic atoms leave the metal or form compounds in the presence of water and gases.
Metal atoms are removed from a structural element until it fails, or oxides build up inside a pipe until it is plugged. Corrosion is an electrochemical process. It can be complicated. Identifying that there is corrosion should be sufficient for novices. Further detailed analysis should be performed by a qualified professional.
There are several types of corrosion, such as:
Uniform Attack
Pitting Corrosion Attack
Crevice Corrosion Attack
Galvanic Corrosion Attack
Erosion-Corrosion Attack
Stress Corrosion Cracking
Fretting Corrosion Attack
Numerous variables can create corrosion. Here are some:
Contamination/impurities
Water quality
Aeration
Galvanic couples
Material selection
Effects of welding
Stagnation
Turbulence
Pressure
Deposits
Crevices
Startups and shutdowns
Here are some basic examples of each type of corrosion:
Pitting Corrosion Attack
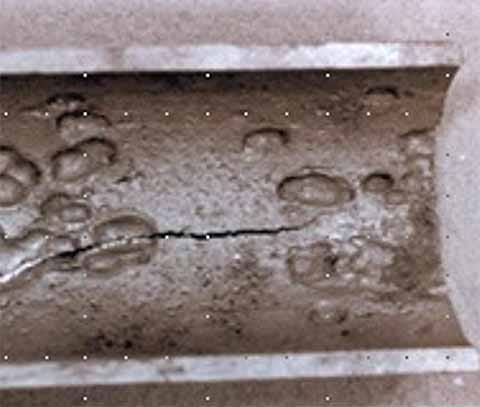
Uniform Corrosion Attack
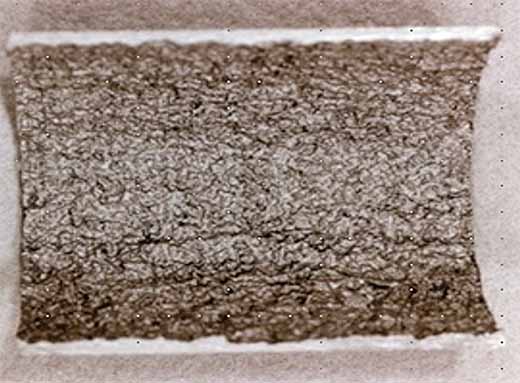
Galvanic Corrosion Attack
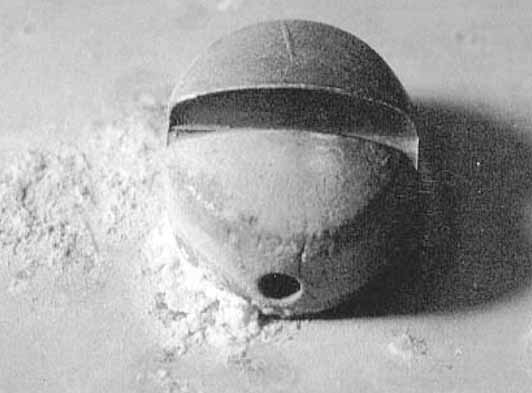
Erosion-Corrosion Attack
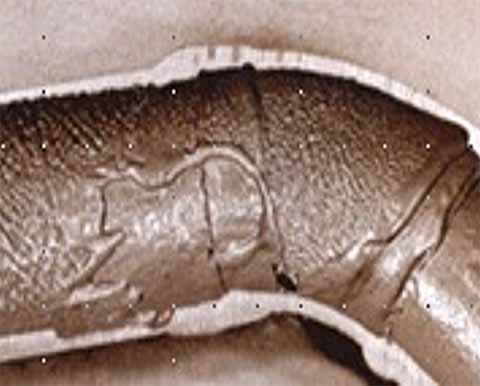
Stress Corrosion Cracking (SCC)
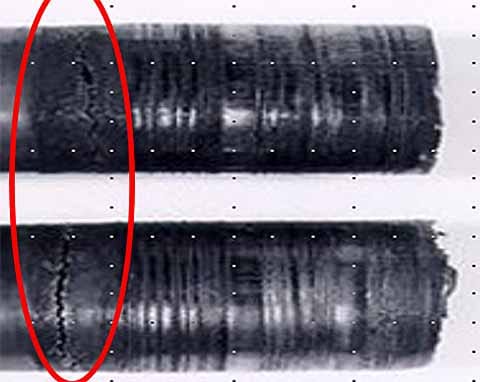
Fretting Corrosion Attack (Poor Housing and/or Shaft Fit)
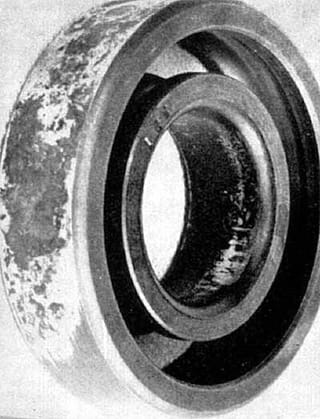
Crevice Corrosion Attack
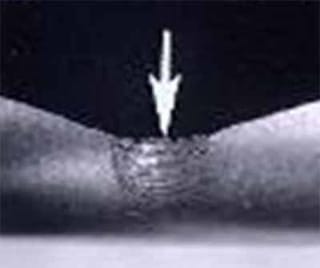
Fatigue
Fatigue is the most common fracture pattern, occurring in about 90% of the cases.
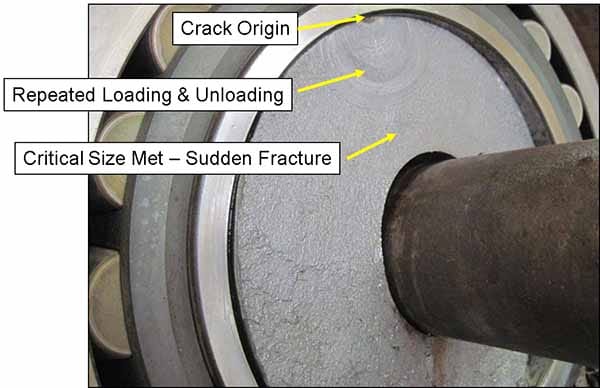
Fatigue occurs when a material is subjected to repeated loading and unloading.
When the loads exceed a certain threshold, microscopic cracks will form at a material's surface.
Cracks always begin in highly stressed areas of a material.
Eventually, a crack will reach a critical size, and the structure will suddenly fracture.
This graphic demonstrates a classic case of fatigue.
Repeated cyclical loading will surface in a variety of forms. Here are a few such applications:
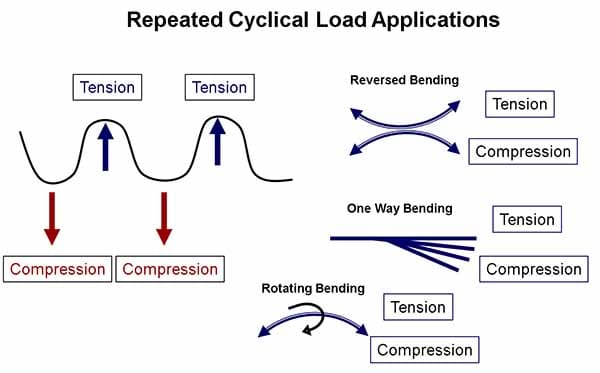
Characteristics of Fatigue
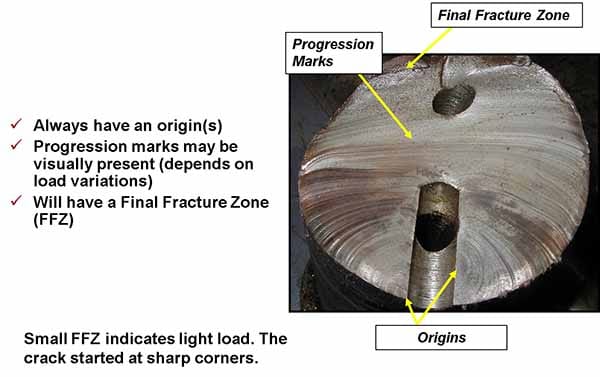
Fatigue failures will contain one or more of the following characteristics:
Always have an origin(s)
Progression marks may be visually present (depending on load variations)
Will have a Final Fracture Zone or FFZ (the larger the FFZ, the higher the load)
Ratchet marks may be present (representing high-stress concentrations [SC])
Spalls (Hertzian Fatigue) may be present (mainly in bearings)
Now let's look at some examples from various environments:
Fatigue - Roller Bearing
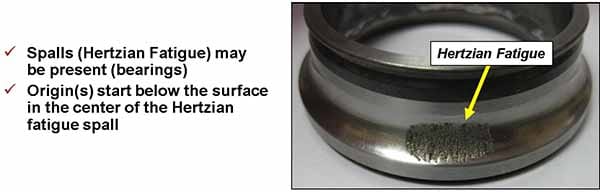
Fatigue - Gear
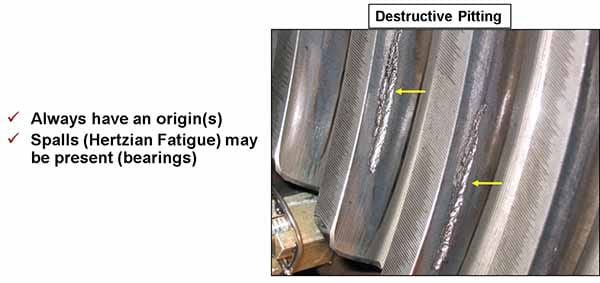
Fatigue - Fastener
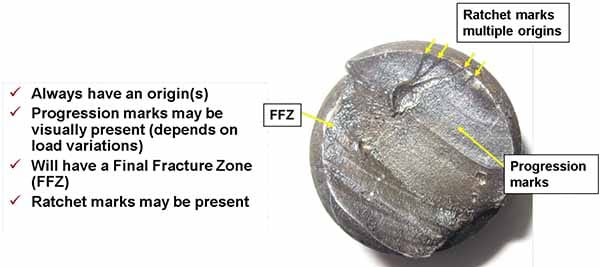
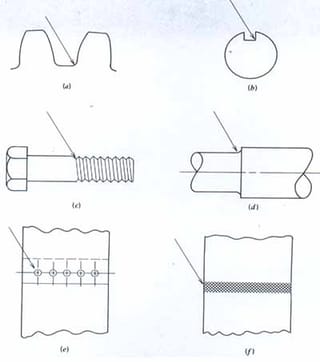
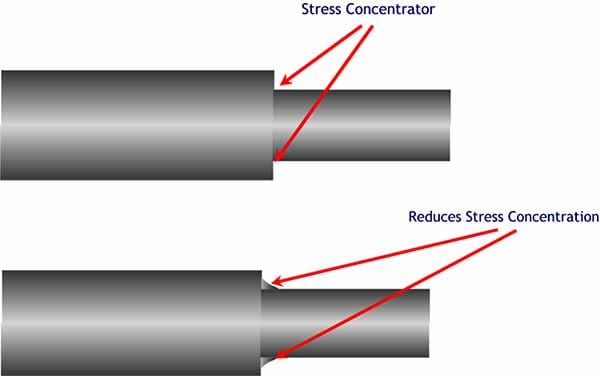
Let's look at where stress concentrations are most prominent on various components.
Common Types of Stress Concentrations
Fatigue - Shaft
Overload
Material Overload is the failure or fracture of a material with a single load application.
When applying this knowledge to a Root Cause Analysis (RCA), the construction of the Logic Tree (or whatever expression you prefer to use) may look like the following:
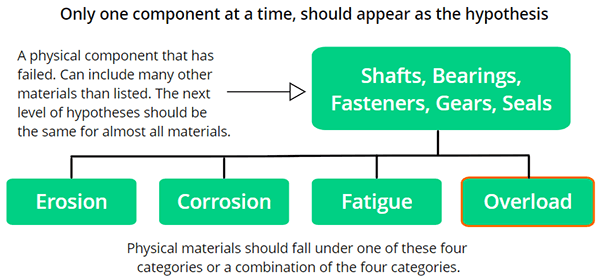
The 'parent' node would indicate which component failed (i.e., shaft failure). The 'child' nodes would represent the potential hypotheses to the question, 'How could the shaft have failed?'
The broad and all-inclusive possibilities would be erosion, corrosion, fatigue, and overload. At this stage, our metallurgical analysis will tell us which failure patterns occurred. It could be one or a combination; a trained eye will tell us.
Once we know which pattern(s) is a FACT, we simply keep drilling down and ask, 'How could the component have been fatigued (example), resulting in the undesirable outcome being experienced?'.
Some reasons materials could be overloaded:
Wrong material for the application
Excessive stress or strain
Flaw in the material
Sudden increase in load or blockage (process changes)
Foreign object seized material (gears)
Foreign object strikes material
Operating equipment outside of its design capabilities
Component overload examples:
Shaft Overload
Fastener Overload
Hook Overload
Anchor Overload
Gear Overload
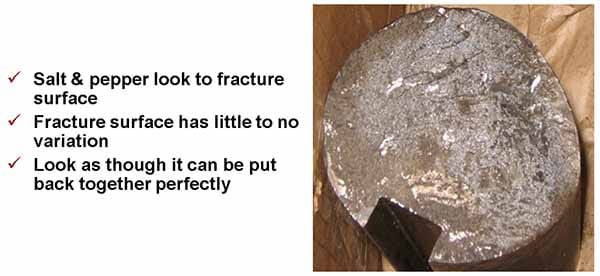
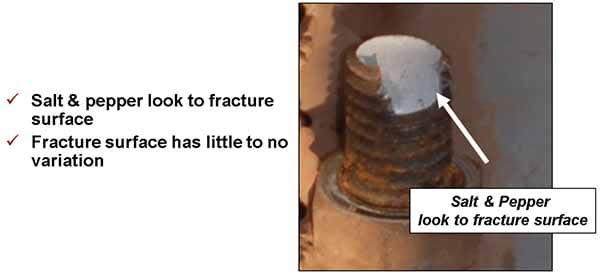
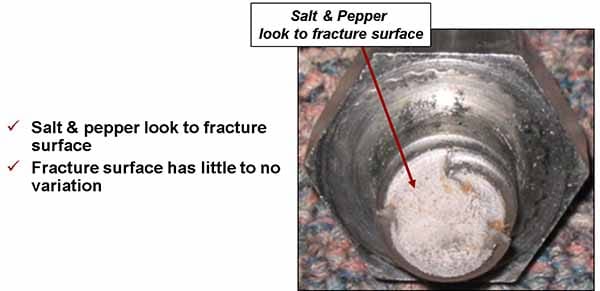
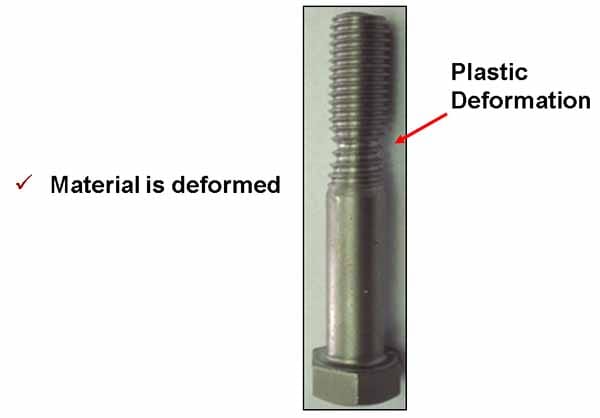
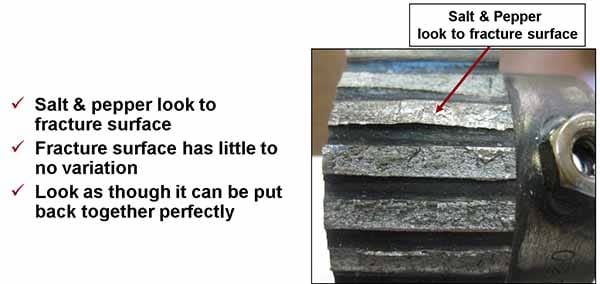
Overload fractures generally fall into two (2) categories: Brittle and Ductile. As you will see from the following examples, Brittle fractures typically exhibit a 'salt and pepper' appearance on the fractured surface with a relatively clean break (lack of variation on the fracture surface). Ductile fractures generally exhibit a deformation of the material in some form or fashion.
In Overload cases, the chevron marks will again point towards the origin of the failure.
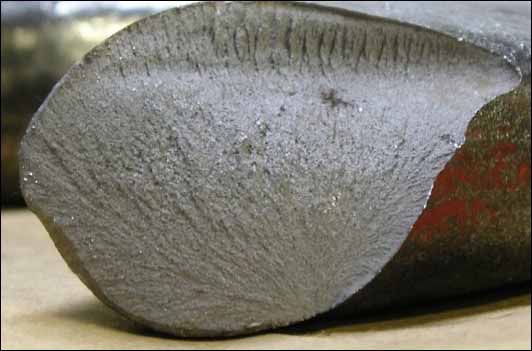
Chevron Marks Leading Back to Origin
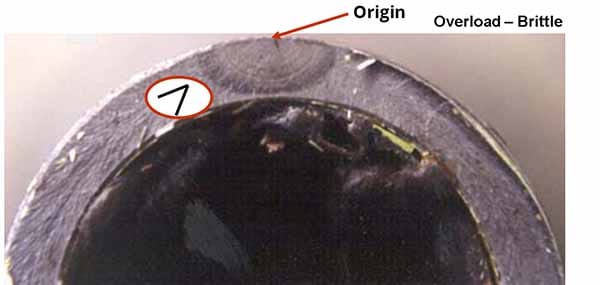
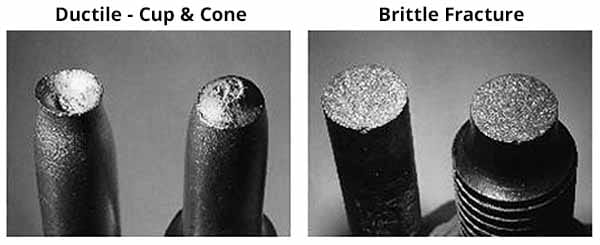
Let's look at some more examples using varied components.
Brittle Overload - Shaft (Gearbox)
Ductile Overload - Shaft
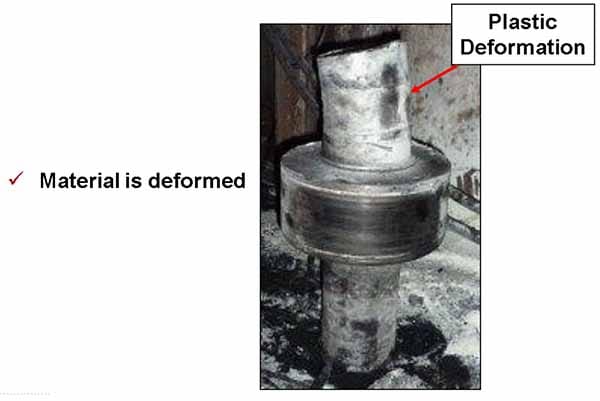
Now, let's look at fasteners and look for the same patterns to identify whether they are brittle or ductile failures.
Brittle Overload - Fastener
Ductile Overload - Fastener
Let's move on to a hook failure and look for similar characteristics of the failed surfaces. Is this a brittle or ductile failure based on its characteristics?
Overload - Hook
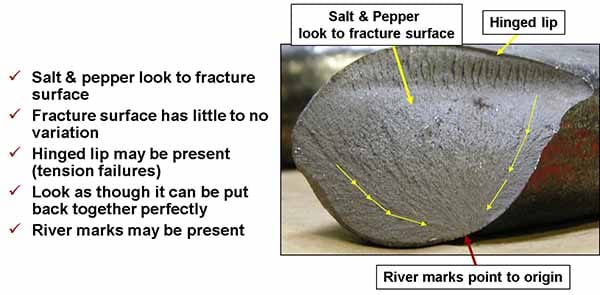
As the caption for this figure states, this is a Brittle Overload. See, it gets easier as we compare and contrast more examples. Let's try again on an Anchor. We can tell it's an overload, but which type?
Overload - Anchor
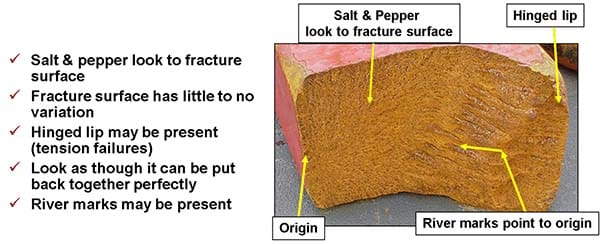
There is no deformation but characteristics of a clean break from being overpowered. In such cases, the opposite sides of the same failed components can often be fitted together to demonstrate they were the same part at one time.
Overload - Gear
For seasoned investigative veterans, this information will be old news (Investigation 101). However, the more the front-line folks in the field know these basics, the more they can assist these veterans in their investigations. Proper investigations cannot be comprehensive without this physical evidence. So, in the end, we are all helping out each other.